Product code: RVDM-HI14C2
Category: Cables and adapters , Cables , Video cables , Video
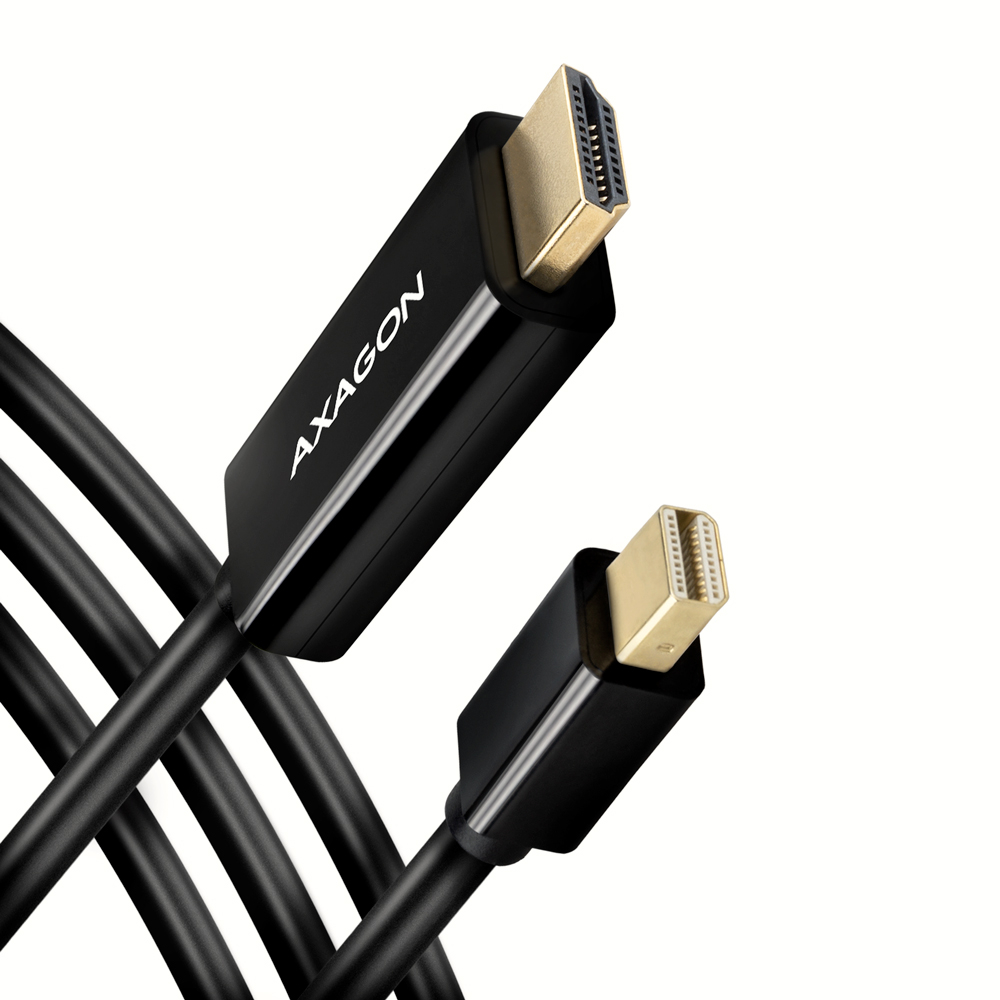
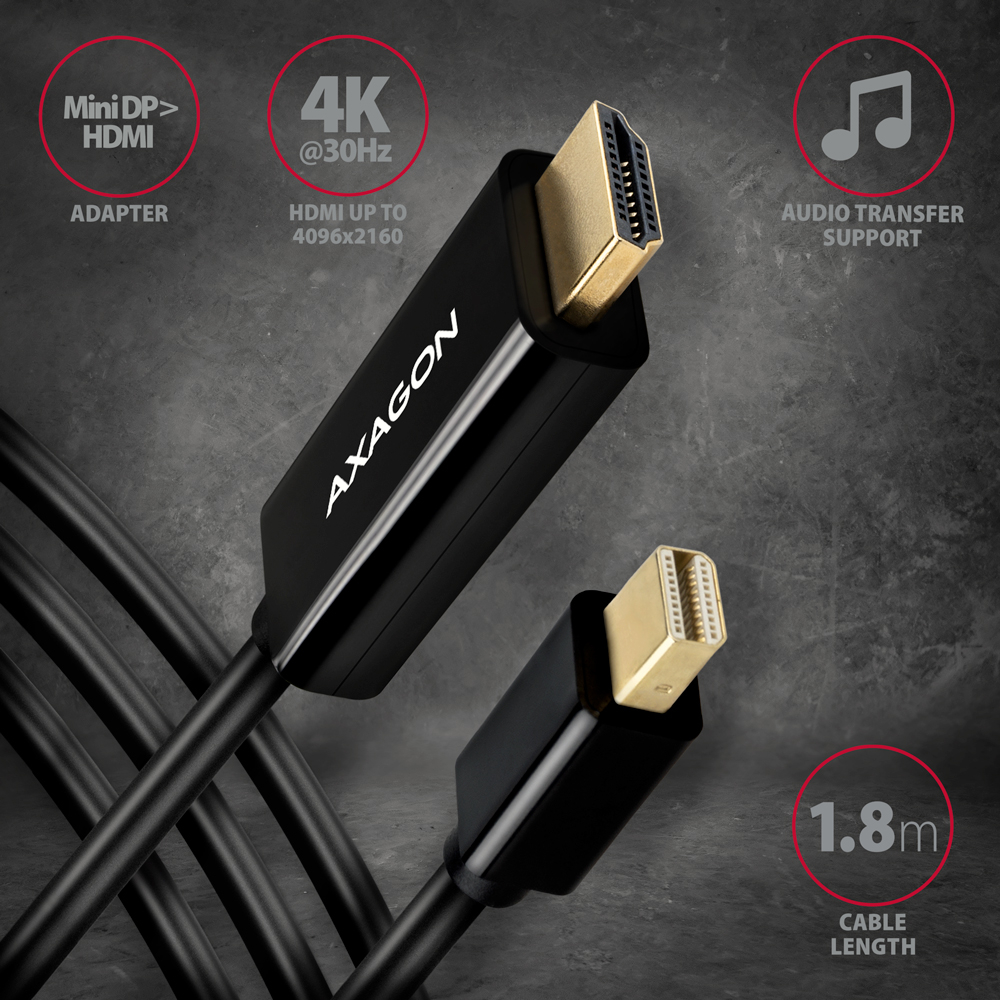
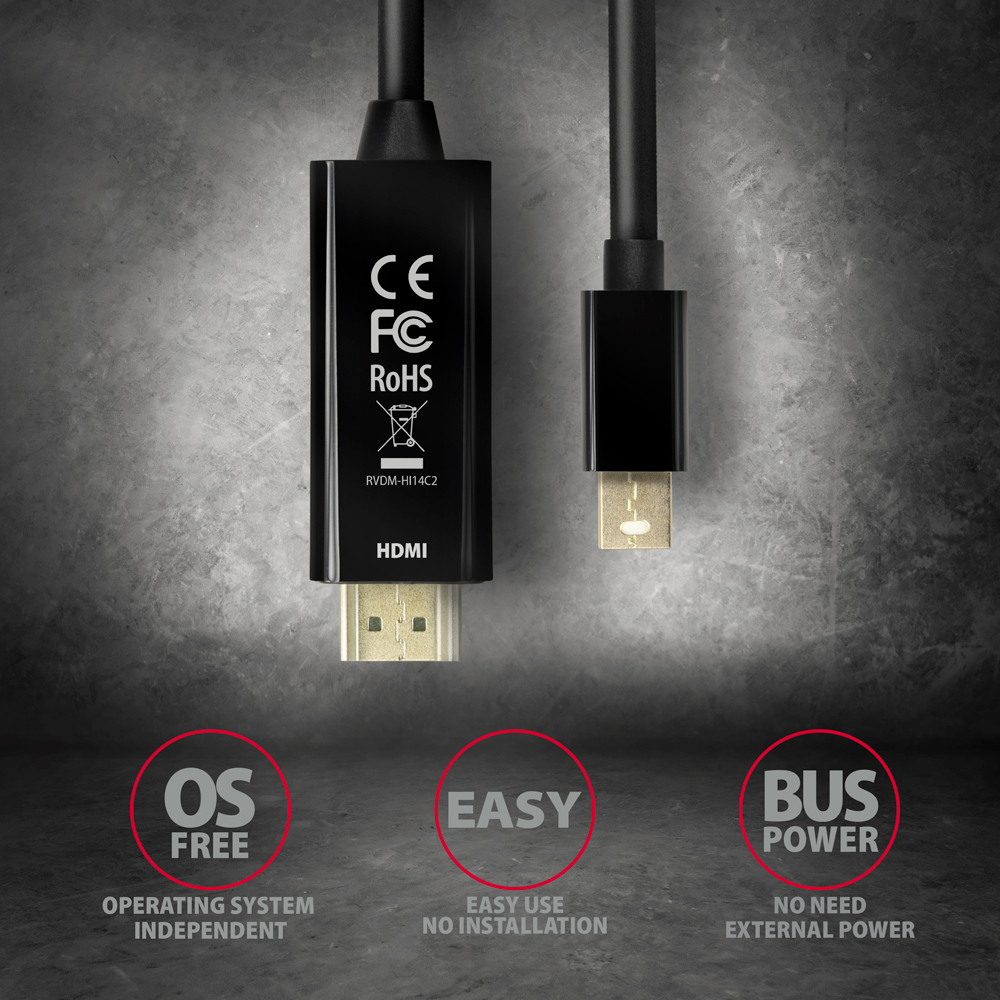
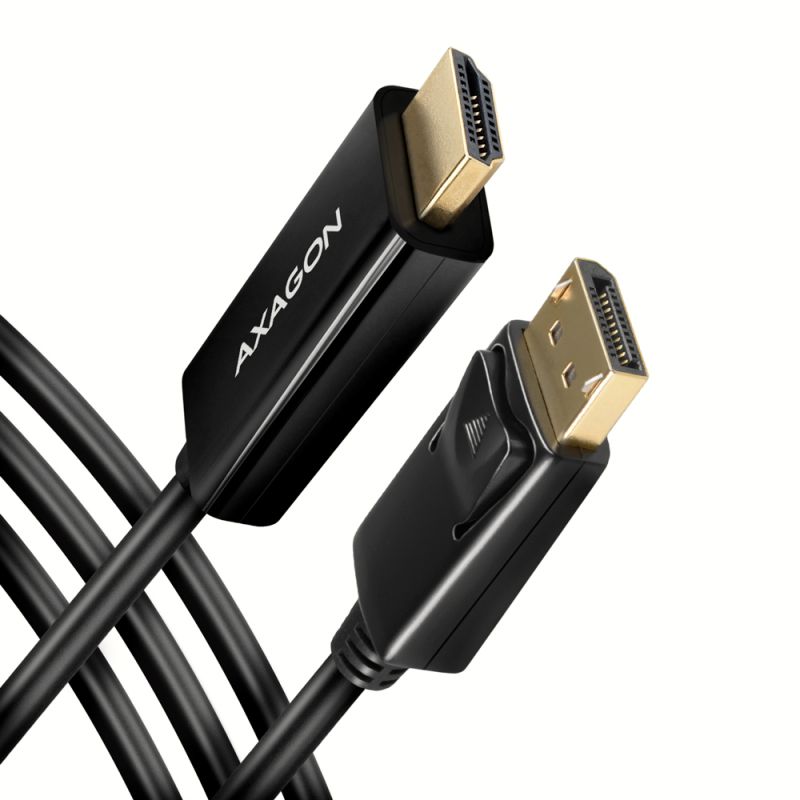
Mini DisplayPort -> HDMI active cable - adapter AXAGON RVDM-HI14C2 to connect HDMI monitor/TV/projector to the computer with the Mini DisplayPort output.
The smart hardware converter without the need for any installation or setup ensures high-quality transfer of image and sound with a resolution up to 4K/30Hz.
Video and audio transfer from a computer or laptop will now be easy. Compact dimensions ensures easy use even in insufficient space. It is an ideal solution - you don't need a HDMI cable and converter. With this active cable everything is integrated into one compact unit.
The cable is only one-way, i.e. Mini DisplayPort to HDMI, not otherwise.
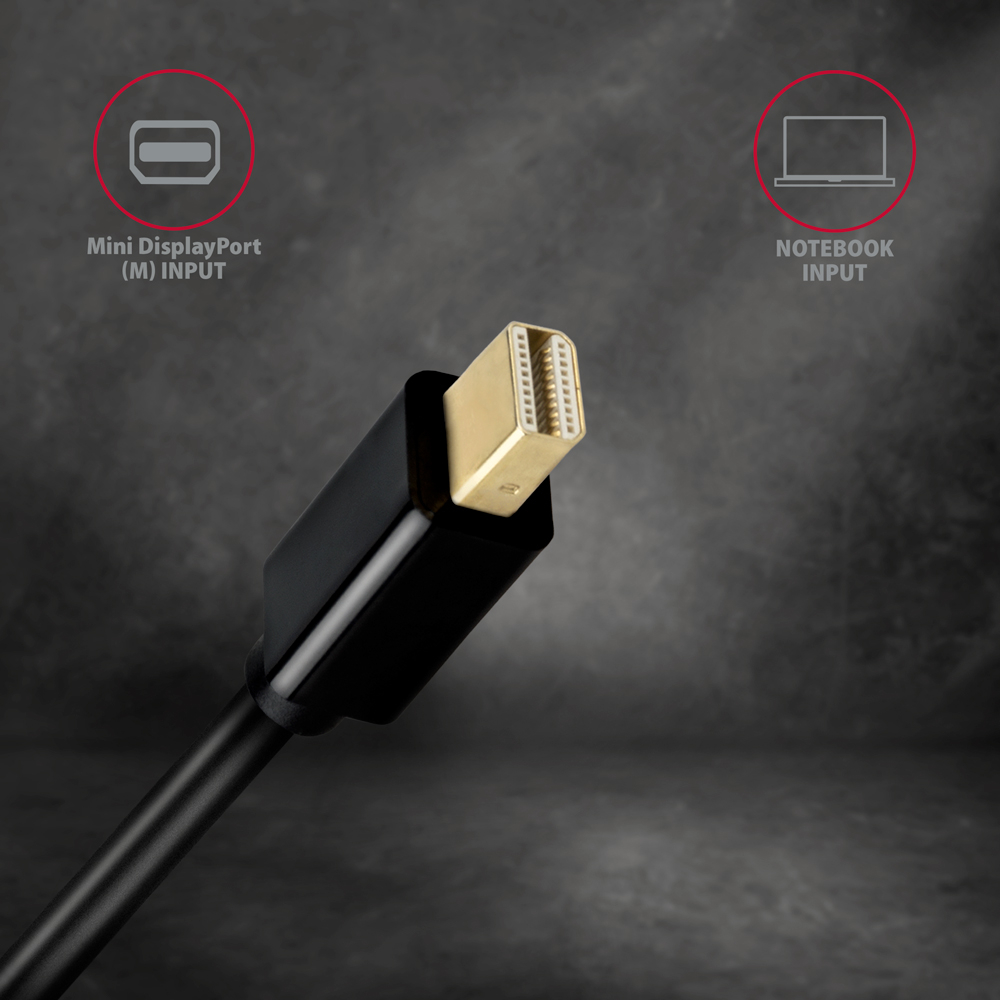
Input:
• Mini DisplayPort v1.2
• Mini DP male connector (M)
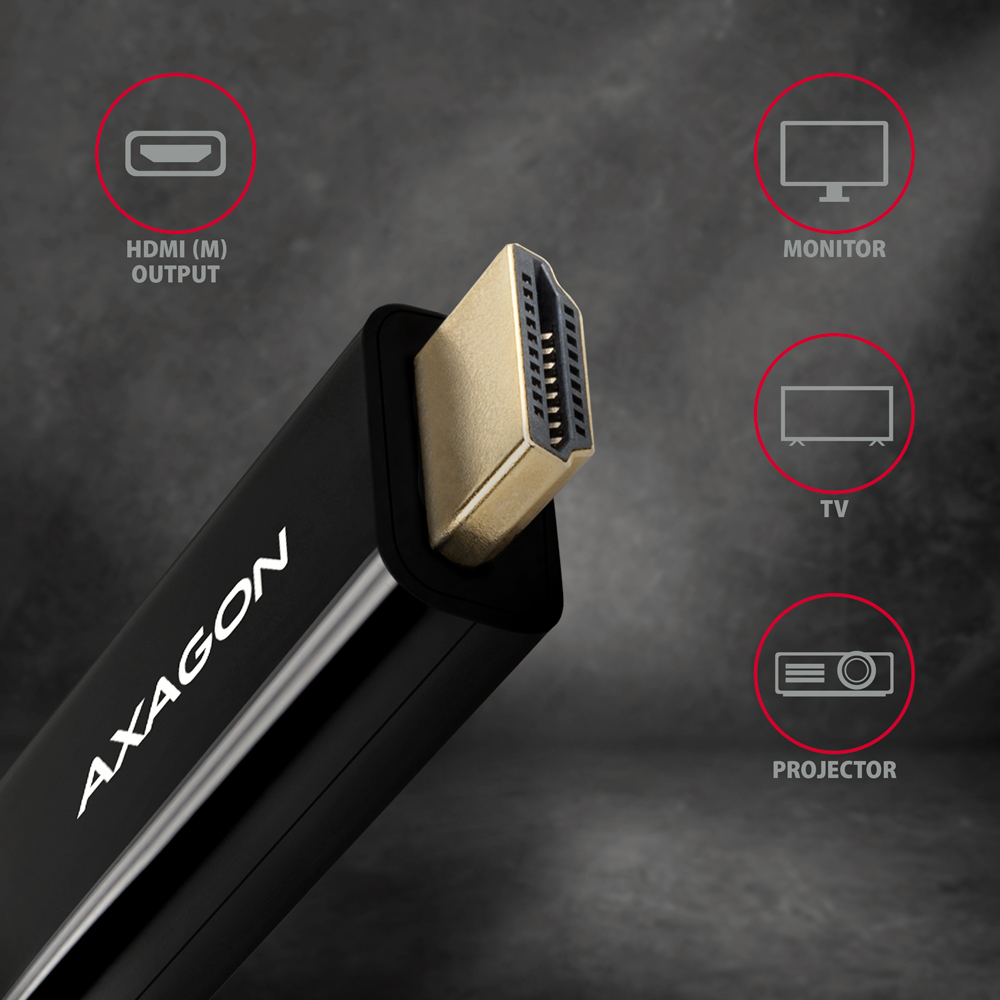
Output:
• HDMI v1.4b
• HDMI A (M) male connector
Supported resolutions:
Resolution and frequency depend on monitor and graphics adapter.
• max. 4096 x 2160 (19:10) @30Hz DCI 4K
• 3840 x 2160 (16:9) @30Hz UHD-1 4K (UHDTV)
• 3840 x 1600 (21:9) UW 4K (Ultrawide 1600p)
• 3840 x 1200 (32:10) 29:9 4K (Super ultrawide 1200p)
• 3840 x 1080 (32:9) 32:9 4K (Super ultrawide 1080p)
• 3440 x 1440 (21:9) UWQHD (Ultrawide 1440p)
• 2560 x 2048 (5:4) QSXGA
• 2560 x 1920 (4:3)
• 2560 x 1600 (16:10) WQXGA
• 2560 x 1440 (16:9) @60Hz WQHD
• 2560 x 1080 (21:9) UWFHD (Ultrawide 1080p)
• 2048 x 1536 (4:3) QXGA
• 2048 x 1152 (16:9) QWXGA
• 1920 x 1440 (4:3)
• 1920 x 1200 (16:10) WUXGA
• 1920 x 1080 (16:9) @60, 75, 100 a 120Hz Full HD/1080p
• 1856 x 1392 (4:3)
• 1792 x 1344 (4:3)
• 1680 x 1050 (16:10) WSXGA+
• 1600 x 1200 (4:3) UXGA
• 1600 x 900 (16:9) HD+
• 1536 x 864 (16:9)
• 1440 x 900 (16:10) WXGA+
• 1400 x 1050 (4:3) SXGA+
• 1366 x 768 (16:9) HD
• 1360 x 768 (16:9) HD
• 1280 x 1024 (5:4) SXGA
• 1280 x 960 (4:3) SXGA-
• 1280 x 800 (16:10) WXGA
• 1280 x 768 (5:3) WXGA
• 1280 x 720 (16:9) HD/WXGA/720p
• 1280 x 600
• 1152 x 864 (4:3) XGA+
• 1024 x 768 (4:3) XGA
• 800 x 600 (4:3) SVGA
Other features:
• sound transfer support
• DDC (Display Data Channel) support - Intelligent setting of resolution, frequency and other parameters according to the source graphics chip
• supported modes: mirroring the primary monitor area (default setting), expanding the primary monitor area
• HPD (Hot-Plug-Detect) support - communication sequence controlling the connection/disconnection of the device while running,
• HDCP 1.4 and 2.2
• support of power saving modes with spinning down controlled by a source device (PC) and a viewing device (monitor/TV)
• power supply via bus - no external power is needed
• gold-plated connectors for perfect contact and oxidation limitation
• adapter dimensions 45 x 21 x 12 mm
• total cable length incl. connector 1.8 m
• weight only 62 g
Supported operating systems:
• All versions of MS Windows, Mac OS X, Linux and other operating systems.
• It is a pure hardware converter, the transfer is provided only by the cable chip without computer participation, no drivers are installed, so the compatibility is not dependent on the operating system used.
Package contains:
• Mini DisplayPort > HDMI cable length 1.8 m,
• printed installation manual in CZ / DE / DK / ENG / ESP / FIN / FR / GR / HR / HU / IT / NL / PL / PT / RO / RU / SK / SWE / TR / BG / CN / ARA,
• packed in a cardboard box.
- mini DP > HDMI cable
- installation guide
- printed multilingual manual CZ / DE / DK / ENG / ESP / FIN / FR / GR / HR / HU / IT / NL / PL / PT / RO / RU / SK / SWE / TR / BG / CN / ARA
- a cardboard box with an option to be hanged on the retail display stands
- package dimensions 20 x 9 x 3 cm
- weight of 1 pc package 103 g
- EAN 8595247906090
- number of pieces in the box: 120
- total weight of the box: 14.7 kg G.W.
- box dimensions: 33 x 35 x 47 cm
RVDM-HI14C2 - installation guide - CZ / DE / DK / ENG / ESP / FIN / FR / GR / HR / HU / IT / NL / PL / PT / RO / RU / SK / SWE / BG / CN / TR / ARA
A): Check that all connectors on the adapter, source device, and display device are properly connected and seated.
B): Check the connecting cables and replace them if necessary.
C): When using long cables (over 10 m), we recommend using high-quality or active cables, or signal amplifiers.
D): Connect a microUSB charger to the external power input.
A): Verify that the given resolution or refresh rate is supported by the display device (monitor, TV, projector), graphics card, drivers, or operating system.
A): Check the settings according to the chapter “SETTING UP AUDIO OUTPUT TO MONITOR, TV, OR PROJECTOR.”
A): Check all connections.
B): Verify in Device Manager that you are not using the “Microsoft Basic Display Adapter.” If you are, install the latest graphics card driver.
A): The use of other cables with ADR cables is not recommended because there is a greater voltage drop on them and there may be communication failures.
B): Only when it is absolutely necessary (such as when connecting a printer), where there is another type of USB-B connector and in the shortest possible length - the use of a transient reduction is ideal.
A) The VGA connector does not transmit the sound, so the RVH-VGA audio stereo output is to a 3.5 jack to which headphones or active speakers can be connected.
B) To use the audio output, set the HDMI output as the default sound playback device (or install audio drivers for the graphics card of your computer).
A) Some devices may need auxiliary power via the microUSB connector on the adapter body. When connecting to a desktop PC or laptop, additional power is not needed.
B) The power supply is not included, but any mobile phone charger with a microUSB output can be used.
A): Check that all connectors on the adapter, source device, and display device are properly connected and seated.
B): The adapter is one-way; check that it is not connected in the wrong direction.
C): Check that the correct input source is selected on the display device.
D): Check that the display output settings on the source device (PC, notebook) are correct. See the chapter “DISPLAY MODE SETTINGS.”
E): Check all connecting cables.
F): Restart the PC (notebook) with the adapter and display device connected.
G): If none of the above works, test the adapter with another device.
A): If a device without own power supply and higher current consumption is connected to an active power cord , the device may not work or works unreliably. If you want to use a self-powered device such as a printer at the end of the cable, no auxiliary power is needed.
B): The auxiliary power supply should be used at a higher demand than 100 mA, or when several cables are connected in series (behind each other). For details, refer to the User Manual (downloadable on the product page).
A): If the adapter is not displayed in "Device Manager" (in USB Bus Controllers - USB Print Support), there may be a USB port malfunction.
B): Try plugging the adapter into another USB port. The adapter should be detected and the drivers loaded automatically. If the problem persists, plug the adapter into the USB port of another computer to verify its functionality.
A): If this happens, it means that the operating system failed to get the necessary information to install the drivers.
B): The cause may be a defective USB cable or damaged device. If the problem persists, plug the adapter into the USB port of another computer to verify its functionality.
A): After installing the drivers the adapter will log in Device Manager in the section Ports (COM and LPT) as USB to serial Comm Port, so it can.
B): However, it still depends on the SW device, some very old programs need a specific interrupt (IRQ) that does not work correctly with the USB / COM converter.
A): You will need a female-female reduction because the ADS-xx has a male end.
B): Be careful that this reduction is not cross-linked (so called Null Modem), so you need a standard non-cross-linked reduction to connect.
A): Yes, using multiple ADS-xx units on one PC (NTB) is possible.
B): Each adapter gets its own COM port number assigned by the system, which can be changed in the settings as needed by the user.